














Good light makes your face easy to see without making you squint. Start with what you already have; you can decide whether you need anything else after a camera test.
Use a window during the day
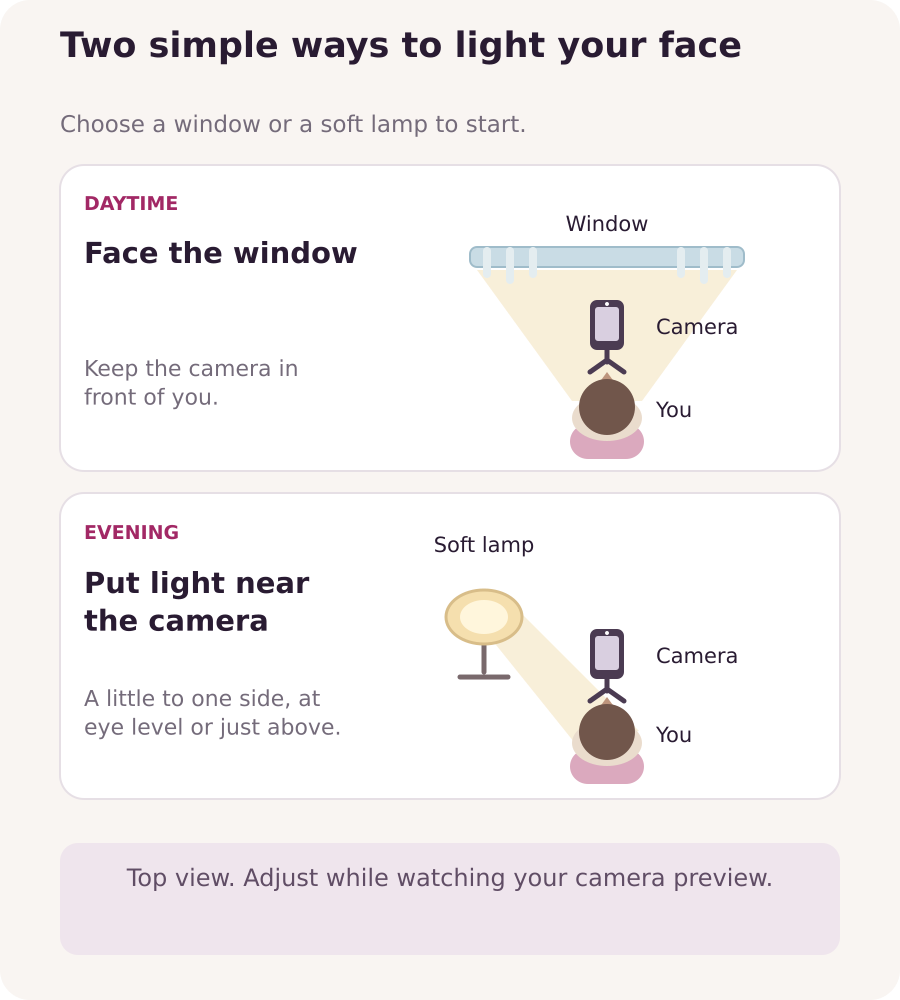
Sit facing a window, or turn slightly towards it, with the camera in front of you. A bright window directly behind you can leave your face dark even when the room feels bright.
Choose gentle daylight rather than a patch of direct sun. If sunlight creates hard shadows or makes you squint, draw a sheer curtain across the window or move out of the sunbeam. Check the preview again when the weather or time of day changes.
Start with one lamp in the evening
Place a lamp with a proper shade or diffuser near the camera, slightly to one side and around eye level or a little above. Begin at a comfortable brightness and look at the camera preview. Ceiling light alone can leave shadows around your eyes.
For gentler light, try aiming the lamp at a nearby white or neutral-coloured wall so light reflects back towards you. If one side of your face is too dark, turn a little towards the main light before adding another lamp. Judge the result on screen.
Fix the problem you can see
- Dark face, bright background: turn towards your main light and reduce the bright light behind you.
- Forehead or cheeks look washed out: lower the lamp’s brightness or move it a little farther away. Look for visible skin detail, not maximum brightness.
- Orange on one side, blue on the other: switch off the competing light first. If you need several lamps, choose bulbs or settings with a similar light colour.
- Reflections over your eyes in glasses: move the lamp slightly higher or farther to the side, then check both lenses. Keep the camera at a comfortable height.
Compare one change at a time
Compare the camera preview before and after each change. With a lamp, try its position first, then brightness. With a window, adjust where you sit or how much light the curtain lets through. Change one thing at a time so you can tell what helped.
Choose the version where your eyes are visible, skin looks natural and bright areas still show detail. Then talk and turn your head as you would in a real conversation. Save a reference photo of the arrangement that works for you.
Before you start
- Your eyes and expression are clearly visible.
- The light feels comfortable while you talk and move.
- Your skin colour looks even and natural.
- Glare on skin or glasses does not hide your features.
- The setup works at the time you actually chat.
Try your setup through one session before buying another light. Buy only when you can name the problem it needs to solve.